


如何使用GCC for openEuler的特色优化功能
发表于 2023/12/04
0
本小节课程将以多个小程序为例,讲解如何使用GCC for openEuler的特色优化功能,帮助开发者使用GCC for openEuler来优化实际应用。
反馈优化
1. 准备工作
源代码sort.c如下所示:
#include <stdio.h>
#include <stdlib.h>
#include <sys/time.h>
#define ARRAY_LEN 30000

static struct timeval tm1;

static inline void start() {
    gettimeofday(&tm1, NULL);
}

static inline void stop() {
    struct timeval tm2;
    gettimeofday(&tm2, NULL);
    unsigned long long t = 1000 * (tm2.tv_sec - tm1.tv_sec) +\
                           (tm2.tv_usec - tm1.tv_usec) / 1000;
    printf("%llu ms\n", t);
}

void bubble_sort (int *a, int n) {
    int i, t, s = 1;
    while (s) {
        s = 0;
        for (i = 1; i < n; i++) {
            if (a[i] < a[i - 1]) {
                t = a[i];
                a[i] = a[i - 1];
                a[i - 1] = t;
                s = 1;
            }
        }
    }
}

void sort_array() {
    printf("Bubble sorting array of %d elements\n", ARRAY_LEN);
    int data[ARRAY_LEN], i;
    for(i=0; i<ARRAY_LEN; ++i){
        data[i] = rand();
    }
    bubble_sort(data, ARRAY_LEN);
}

int main(){
    start();
    sort_array();
    stop();
    return 0;
}
2. 使用PGO优化
使用GCC for openEuler编译目标程序:
$ gcc -O2 -o baseline sort.c执行baseline,记录性能基线:
$ ./baseline
Bubble sorting array of 30000 elements
2280 ms
因此,在优化前的基线为2280ms。
添加PGO插桩所需编译选项“-fprofile-generate”,得到插桩二进制:
$ gcc -O2 -o pgoing sort.c -fprofile-generate
$ ls
baseline pgoing sort.c
执行插桩版本二进制,收集profile:
$ ./pgoing
$ ls
baseline pgoing sort.c sort.gcda
可以使用gcov工具查看收集到的profile信息:
$ gcov-dump sort.gcda
sort.gcda:data:magic `gcda':version `B03*'
sort.gcda:stamp 1489740614
sort.gcda: a1000000: 2:OBJECT_SUMMARY runs=1, sum_max=891420285
sort.gcda: 01000000: 3:FUNCTION ident=108032747, lineno_checksum=0xe646e78c, cfg_checksum=0x81f343b9
sort.gcda: 01a10000: 8:COUNTERS arcs 4 counts
sort.gcda: 01af0000: 2:COUNTERS time_profiler 1 counts
sort.gcda: 01000000: 3:FUNCTION ident=1360211281, lineno_checksum=0x0a861fab, cfg_checksum=0x01813cbe
sort.gcda: 01a10000: 10:COUNTERS arcs 5 counts
sort.gcda: 01af0000: 2:COUNTERS time_profiler 1 counts
sort.gcda: 01000000: 3:FUNCTION ident=1132282280, lineno_checksum=0x31524263, cfg_checksum=0x2cb7049d
sort.gcda: 01a10000: 8:COUNTERS arcs 4 counts
sort.gcda: 01af0000: 2:COUNTERS time_profiler 1 counts
sort.gcda: 01000000: 3:FUNCTION ident=634341578, lineno_checksum=0x8a89e241, cfg_checksum=0xf3b49cda
sort.gcda: 01a10000: 6:COUNTERS arcs 3 counts
sort.gcda: 01af0000: 2:COUNTERS time_profiler 1 counts
利用profile,编译优化后的二进制,添加-fopt-info选项查看编译器执行了哪些优化决策:
$ gcc -O2 -o pgoed sort.c -fprofile-use -fopt-info
sort.c:45:5: optimized: Inlining start/23 into main/27.
sort.c:47:5: optimized: Inlined stop/24 into main/27 which now has time 57.000000 and size 22, net change of -4.
sort.c:24:9: optimized: loop unrolled 7 times (header execution count 891420285)
$ ls
baseline pgoing sort.c sort.gcda pgoed
执行优化后的二进制,验证优化效果:
$ ./pgoed
Bubble sorting array of 30000 elements
1840 ms
可以发现执行时间明显缩短,PGO能够帮助用户在源码不变的情况下提升性能。
3. 使用BOLT优化
准备源码:
源码使用与反馈优化PGO相同的sort.c文件。
记录性能基线,收集profile:
该步骤与反馈优化PGO步骤相同。
利用profile,编译AutoBOLT优化后的二进制:
$ gcc -g -O2 -o AutoBOLT sort.c -fprofile-use -fauto-bolt -Wl,-q -fopt-info执行优化后的二进制,验证优化效果:
$ ./baseline
Bubble sorting array of 30000 elements
4587 ms
$ ./AutoBOLT
Bubble sorting array of 30000 elements
1848 ms
利用AutoBOLT获取的profile执行BOLTuse模式:
$ gcc -g -O2 -o BOLTuse sort.c -fbolt-use=AutoBOLT.fdata -Wl,-q
$ ./BOLTuse
Bubble sorting array of 30000 elements
2323 ms
4. 使用AutoFDO优化
安装相关依赖包:
$ yum install -y autofdo perf llvm-bolt准备源码:
源码使用与反馈优化PGO相同的sort.c文件。
构建目标二进制,特别注意需添加编译选项-g来包含debug-info:
$ gcc -g -O2 -o baseline sort.c
$ ls
baseline sort.c
使用perf采集profile文件:
注意,使用perf需要root权限,因此以下命令我们使用root执行。
# perf record -e cycles:u -o perf.data ./baseline
Bubble sorting array of 30000 elements
2286 ms
[ perf record: Woken up 2 times to write data ]
[ perf record: Captured and wrote 0.351 MB perf.data (9159 samples) ]
# ls
baseline perf.data sort.c
使用AutoFDO工具链中的create_gcov创建gcov:
# create_gcov --binary=baseline --profile=perf.data --gcov=profile.gcov --gcov_version=1 --use_lbr=0
# ls
baseline perf.data profile.gcov profile.gcov.imports sort.c
使用dump_gcov工具查看生成的profile文件:
# dump_gcov profile.gcov --gcov_version=1
sort_array total:9103 head:0
  0: 0
  1: 0
  1.1: 0
  3: 0
  3.3: 0
  4.3: 0
  7: 0
  6: bubble_sort total:9103
    2: 0
    4.2: 3992
    5: 1846
    7: 392
9: 2873
使用通过采样得到的profile文件,生成优化后的程序,添加-fopt-info选项查看编译器执行了哪些优化决策:
# gcc -g -O2 -o pmu sort.c -fauto-profile=profile.gcov -fopt-info
sort.c:41:5: optimized: Inlining bubble_sort/25 into sort_array/26.
sort.c:45:5: optimized: Inlining start/23 into main/27.
sort.c:47:5: optimized: Inlined stop/24 into main/27 which now has time 57.000000 and size 22, net change of -4.
sort.c:24:9: optimized: loop unrolled 7 times (header execution count 955630225)
sort.c:24:9: optimized: loop unrolled 7 times (header execution count 3992)
分别执行基线和优化后的二进制,验证优化效果:
# ./baseline
Bubble sorting array of 30000 elements
2282 ms
# ./pmu
Bubble sorting array of 30000 elements
2125 ms
可以发现优化后的程序运行时间缩短,性能提升明显。
增加编译器选项-fprofile-correction使能mcf算法(可选):
# gcc -g -O2 -o mcf sort.c -fauto-profile=profile.gcov -fprofile-correction分别执行基线和使用了mcf算法后的程序,验证优化效果:
# ./baseline
Bubble sorting array of 30000 elements
2280 ms
# ./pmu
Bubble sorting array of 30000 elements
2127 ms
# ./mcf
Bubble sorting array of 30000 elements
2086 ms
可以发现优化后的程序运行时间缩短,性能提升明显。
注意,mcf算法效果与实际应用场景有关,建议充分测试后使用。
结构体优化
结构体成员重排
准备用例a.c:
#include <stdio.h>
#include <stdlib.h>
#include <time.h>

typedef struct arc
{
  int a;
  double b;
  double c;
  double d;
  short e;
  double f;
  double g;
  double h;
  double i;
} arc_t;
const int MAX = 10000000;

int main ()
{
  arc_t* arcs = (arc_t*) calloc (MAX, sizeof (arc_t));
  time_t start = clock();
  for (int i = 0; i < MAX; i++)
    {
      arcs[i].a = 1;
      arcs[i].i = 2;
    }
  for (int i = 0; i < MAX; i++)
    {
      if (arcs[i].a != 1 || arcs[i].i != 2)
        abort();
    }
  time_t end = clock();
  printf("The execution used %f ms.\n", difftime(end, start));
  return 0;
}
对a.c中的结构体类型进行如下修改,并生成b.c:
struct arc
{
  int a;
  double b;
  double c;
  double d;
  short e;
  double f;
  double g;
  double h;
  double i;
};
struct arc
{
double b;
double c;
double d;
double f;
double g;
double h;
double i;
int a;
short e;
};对a.c和b.c进行编译:
$ gcc -O3 a.c -o base
$ gcc -O3 b.c -o test1
执行手动优化结构体的效果:
$ ./base
The execute used 160.616000 ms.
$ ./test1
The execute used 143.385000 ms.
实验对比手动优化前后的运行时间,从中可以计算出速度比约为1.12(160/143)。
对a.c分别进行开关优化的编译:
$ gcc -O3 a.c -o base
$ gcc -O3 -flto -fwhole-program -flto-partition=one -fipa-reorder-fields a.c -o test2
执行优化查看效果:
$ ./base
The execute used 161.572000 ms.
$ ./test2
The execute used 145.456000 ms.
从测试用例的运行时间可以看出,通过开启结构体成员重排优化,可以得到和手动优化相似的优化效果。
鲲鹏亲和优化
1. 使用数组加宽比较优化(array-widen-compare)
准备用例test.c:
#include <stdint.h>
#include <stdio.h>
#include <sys/time.h>
#define LEN 1024000

#define my_min(x, y) ((x) < (y) ? (x) : (y))

// 优化主体函数 (优化选项 -farray-widen-compare)
uint32_t
func (uint32_t len0, uint32_t len1, const uint32_t len_limit, const uint8_t *const pb, const uint8_t *const cur)
{
   uint32_t len = my_min(len0, len1);
    while (++len != len_limit)
        if (pb[len] != cur[len])
            break;
    return len;
}

int main()
{
  uint8_t pb[LEN] = {0};
  uint8_t cur[LEN] = {0};

  // 前期数据准备
  for(int i = 0; i< LEN-1; i++) {
    pb[i] = i*2+3;
  }
  pb[LEN-1] = 5;
  for(int i = 0; i< LEN-1; i++) {
    cur[i] = i*2+3;
  }
  cur[LEN-1] =6;

  uint32_t res = 0;
  struct timeval start, end;
  long time;
  gettimeofday(&start, NULL);

  // 主要循环
  for (int i = 0; i < 2000; i++) {
    res = func(0, 0, LEN-1, pb, cur);
  }

  gettimeofday(&end, NULL);

  // 计算循环执行时间
  time = (end.tv_sec-start.tv_sec)*1000000+(end.tv_usec-start.tv_usec);
  printf("\nRunning Time:%ld us\n", time);
  printf("res=%d\n", res);
  return 0;
}
对test.c进行原生编译:
$ gcc -O3 test.c -o test_before对test.c 进行添加选项编译:
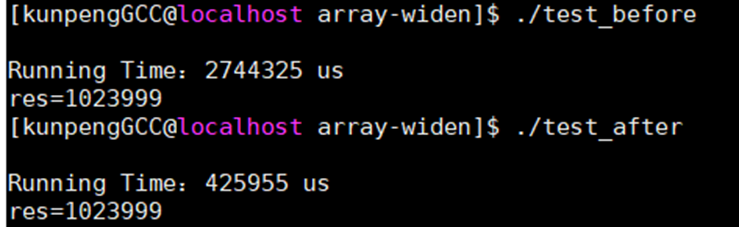
$ gcc -O3 -farray-widen-compare -o test_after执行test_before:
$ ./test_before
Running Time: 2744325 us
res=1023999
执行test_ after:
$ ./test_after
Running Time: 425955 us
res=1023999
从结果上看,编译增加array-widen-compare选项之后运行时间缩减约80%,同时最终结果保持一致,表明该优化选项在此类场景下能够取得显著提升。
2. 使用ccmp指令流水优化
准备用例test.c:
int func (int a, int b, int c)
{
  while(1)
    {
      if(a-- == 0 || b >= c)
        {
          return 1;
        }
    }
}
对test.c原生编译为汇编代码:
$ gcc -O -S test.c -o base.s查看汇编代码:
$ vim base.s核心函数部分为:
func:
.LFB0:
        .cfi_startproc
.L2:
        cmp     w1, w2
        cset    w3, ge
        cmp     w0, 0
        cset    w4, eq
        orr     w3, w3, w4
        sub     w0, w0, #1
        cbz     w3, .L2
        mov     w0, 1
        ret
        .cfi_endproc
.LFE0:
使用ccmp指令优化编译:
$ gcc -O -fccmp2 -S test.c -o test.s查看优化后的汇编代码:
$ vim test.s核心部分为:
func:
.LFB0:
        .cfi_startproc
        b       .L2
.L3:
        mov     w0, w3
.L2:
        sub     w3, w0, #1
        cmp     w0, 0
        ccmp    w1, w2, 0, ne
        blt     .L3
        mov     w0, 1
        ret
        .cfi_endproc
.LFE0::
经过优化之后在arm64平台上能够使能ccmp指令。SPECCPU2017子项557提升约1%。
编译器插件框架
1. 编译器插件框架安装
安装插件框架GCC客户端依赖软件:
yum install -y grpc
yum install -y grpc-devel
yum install -y grpc-plugins
yum install -y protobuf-devel
yum install -y jsoncpp
yum install -y jsoncpp-devel
yum install -y gcc-plugin-devel
yum install -y llvm-mlir
yum install -y llvm-mlir-devel
yum install -y llvm-devel
安装插件框架服务端依赖软件:
yum install -y grpc
yum install -y grpc-devel
yum install -y grpc-plugins
yum install -y protobuf-devel
yum install -y jsoncpp
yum install -y jsoncpp-devel
yum install -y llvm-mlir
yum install -y llvm-mlir-devel
yum install -y llvm-devel
构建插件框架GCC客户端:
git clone https://gitee.com/src-openeuler/pin-gcc-client.git
cd pin-gcc-client
mkdir -p ~/rpmbuild/SOURCES
cp *.path pin-gcc-client.tar.gz ~/rpmbuild/SOURCES
rpmbuild -ba pin-gcc-client.spec
cd ~/rpmbuild/RPMS
rpm -ivh pin-gcc-client.rpm
构建插件框架服务端:
git clone https://gitee.com/src-openeuler/pin-server.git
cd pin-server
mkdir -p ~/rpmbuild/SOURCES
cp *.path pin-server.tar.gz ~/rpmbuild/SOURCES
rpmbuild -ba pin-server.spec
cd ~/rpmbuild/RPMS
rpm -ivh pin-server.rpm
2. 编译器插件框架使用方法
用户可以通过-fplugin和-fplugin-arg-libpin_xxx使能插件工具。 命令如下:
$(TARGET): $(OBJS)
    $(CXX) -fplugin=${CLIENT_PATH}/build/libpin_gcc_client.so \
    -fplugin-arg-libpin_gcc_client-server_path=${SERVER_PATH}/build/pin_server \
    -fplugin-arg-libpin_gcc_client-log_level="1" \
-fplugin-arg-libpin_gcc_client-arg1="xxx"
为了方便用户使用,可以通过${INSTALL_PATH}/bin/pin-gcc-client.json文件,进行插件配置。配置选项如下:
path : 配置插件框架服务端可执行文件路径
sha256file : 配置插件工具的校验文件xxx.sha256路径
timeout : 配置跨进程通信超时时间,单位ms
编译选项的含义
-fplugin:指定插件客户端.so所在路径
-fplugin-arg-libpin_gcc_client-server_path:指定插件服务端可执行程序所在路径
-fplugin-arg-libpin_gcc_client-log_level:指定日志系统默认记录等级,取值0~3。默认为1
-fplugin-arg-libpin_gcc_client-argN:用户可以根据插件工具要求,指定其他参数。argN代指插件工具要求的参数字段。
3. 新增编译器插件并在GCC编译器使能
以编译器插件框架的示例插件工具ArrayWiden为例。该工具的目的是用宽数据类型对原数组指针(指向的数组元素为窄类型)解引用,达到一次比较多个元素的效果,进而提升程序性能。
此实验通过插件向GCC编译器添加新的功能,以此来干预GCC的编译过程,同时无需修改GCC编译器代码。
准备测试用例test.c,具体代码如下:
#include <stdint.h>
#include <stdio.h>
#include <sys/time.h>
#define LEN 1024000
#define my_min(x, y) ((x) < (y) ? (x) : (y))
// 优化主体函数 (优化选项 -farray-widen-compare)
uint32_t
func (uint32_t len0, uint32_t len1, const uint32_t len_limit, const uint8_t *const pb, const uint8_t *const cur)
{
   uint32_t len = my_min(len0, len1);
    while (++len != len_limit)
        if (pb[len] != cur[len])
            break;
    return len;
}

int main()
{
  uint8_t pb[LEN] = {0};
  uint8_t cur[LEN] = {0};
  // 前期数据准备
  for(int i = 0; i< LEN-1; i++) {
    pb[i] = i*2+3;
  }
  pb[LEN-1] = 5;
  for(int i = 0; i< LEN-1; i++) {
    cur[i] = i*2+3;
  }
  cur[LEN-1] =6;
  uint32_t res = 0;
  struct timeval start, end;
  long time;
  gettimeofday(&start, NULL);
  // 主要循环
  for (int i = 0; i < 2000; i++) {
    res = func(0, 0, LEN-1, pb, cur);
  }
  gettimeofday(&end, NULL);
  // 计算循环执行时间
  time = (end.tv_sec-start.tv_sec)*1000000+(end.tv_usec-start.tv_usec);
  printf("\nRunning Time:%ld us\n", time);
  printf("res=%d\n", res);
  return 0;
}
在插件框架服务端配置使能ArrayWidenPass:
cd pin-server
vim user/user.cpp
修改为如下代码:
#include "PluginAPI/PluginServerAPI.h"
#include "user/ArrayWidenPass.h"
void RegisterCallbacks(void)
{
    PinServer::PluginServer *pluginServer = PinServer::PluginServer::GetInstance();
    PluginOpt::ManagerSetup setupData(PluginOpt::PASS_PHIOPT, 1, PluginOpt::PASS_INSERT_AFTER);
    pluginServer->RegisterPassManagerOpt(setupData, std::make_shared<PluginOpt::ArrayWidenPass>());
}
在CMakeLists.txt 85行处修改如下代码:
add_library(pin_user SHARED
  "user/ArrayWidenPass.cpp"
  "user/user.cpp")
重新构建插件框架服务端:
cd pin-server
mkdir build
cd build
cmake ../ -DMLIR_DIR=${MLIR_PATH} -DLLVM_DIR=${LLVM_PATH}
make
使用插件进行优化:
作为对照组,对测试用例test.c进行原生编译:
gcc -O3 test.c -o test_before使用优化插件对测试用例进行编译:
gcc -O3 -fplugin=${CLIENT_PATH}/build/libpin_gcc_client.so -fplugin-arg-libpin_gcc_client-server_path=${SERVER_PATH}/build/pin_server test.c -o test_after执行test_before
./test_before
Running Time: 2744325 us
res=1023999
执行test_ after
./test_after
Running Time: 425955 us
Res=1023999
查看优化效果:
从结果上看:编译加上优化插件之后运行时间缩减约80%,同时最终结果是一致的;表明该优化插件,可以在不修改任何GCC编译器代码的情况,干预GCC编译过程,在此类场景下使能优化取得显著性能提升。