本文中,Ceph的集群规划为3台服务端节点和3台客户端节点。
- 在所有服务端节点配置镜像源。

若有外网条件则无需配置。
- 配置openEuler本地源。
将OS对应的everything镜像源文件上传到服务器,通过SFTP工具将“openEuler-***-everything-aarch64-dvd.iso”上传到服务器上“/root”目录下。
1
2
mkdir -p /iso
mount /root/openEuler-***-everything-aarch64-dvd.iso /iso
- 创建镜像yum源。
1vi /etc/yum.repos.d/openEuler.repo - 在文件中加入以下内容:
1
2
3
4
5
6
[Base]
name=Base
baseurl=file:///iso
enabled=1
gpgcheck=0
priority=1
- 配置openEuler本地源。
- 下载compat-openssl10-1.0.2o-5.fc30.aarch64.rpm并安装。
下载链接:https://archives.fedoraproject.org/pub/archive/fedora/linux/releases/30/Everything/aarch64/os/Packages/c/
wget https://archives.fedoraproject.org/pub/archive/fedora/linux/releases/30/Everything/aarch64/os/Packages/c/compat-openssl10-1.0.2o-5.fc30.aarch64.rpm --no-check-certificate
rpm -ivh compat-openssl10-1.0.2o-5.fc30.aarch64.rpm
- 关闭防火墙。
关闭本节点防火墙,需在所有服务端节点和客户端节点依次执行如下命令。
1
2
3
systemctl stop firewalld
systemctl disable firewalld
systemctl status firewalld

- 配置主机名。
配置永久静态主机名,服务端节点配置为ceph1~ceph3,客户端节点配置为client1~client3。
- 配置节点名称。
- ceph1节点:
1hostnamectl --static set-hostname ceph1
- client1节点:
1hostnamectl --static set-hostname client1
其余节点以此类推。
- ceph1节点:
- 修改域名解析文件。
1vi /etc/hosts在所有服务端节点和客户端节点的“/etc/hosts”中添加如下内容:
1
2
3
4
5
6
192.168.3.166   ceph1
192.168.3.167   ceph2
192.168.3.168   ceph3
192.168.3.160   client1
192.168.3.161   client2
192.168.3.162   client3
以上的IP地址仅为示例,需根据实际情况进行替换。可通过ip a命令查询实际IP地址。服务端节点主机名建议配置为ceph1~ceph3,客户端节点主机名建议配置为client1~client3。上述示例以3节点服务端和3节点客户端为例,根据实际节点数量调整。
- 配置节点名称。
- 配置NTP。
Ceph中会自动校验存储节点之间的时间,若不同节点之间时差较大,会有告警,因此需要在各节点间配置时钟同步。
- 安装NTP服务。
- 在所有服务端节点和客户端节点安装NTP。
1yum -y install ntp ntpdate
- 在所有服务端节点和客户端节点备份旧配置。
1cd /etc && mv ntp.conf ntp.conf.bak
- 以ceph1为NTP服务端节点,在ceph1新建NTP文件。
1vi /etc/ntp.conf并新增如下内容作为NTP服务端:1 2 3 4 5 6 7 8 9
restrict 127.0.0.1
restrict ::1
restrict 192.168.3.0 mask 255.255.255.0
server 127.127.1.0
fudge 127.127.1.0
stratum 8
restrict default kod nomodify notrap nopeer noquery
interface ignore wildcard
interface listen x.x.x.x(此处为服务器的IP地址)
其中,“restrict 192.168.3.0 mask 255.255.255.0”是ceph1所在的IP网段与掩码。
- 在ceph2、ceph3及所有客户端节点新建NTP文件。
1vi /etc/ntp.conf并新增如下内容,其中IP地址为ceph1的地址。1server 192.168.3.166
- 在所有服务端节点和客户端节点安装NTP。
- 启动NTP服务。
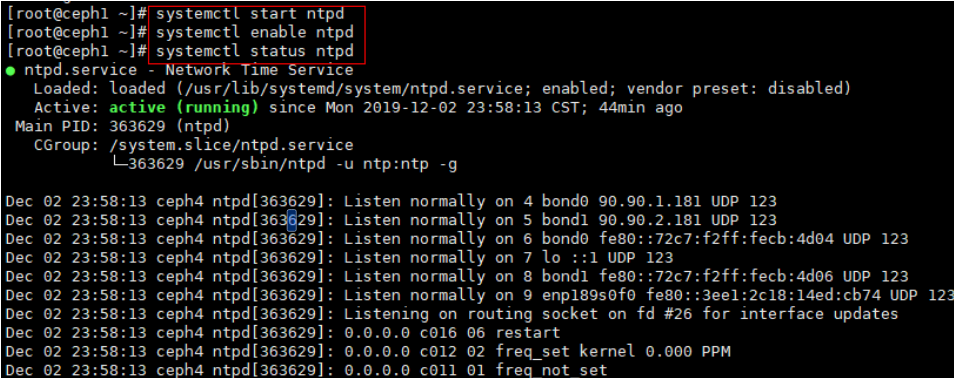
- 在ceph1节点启动NTP服务,并检查状态。
1
2
3
systemctl start ntpd
systemctl enable ntpd
systemctl status ntpd
- 在除ceph1的所有节点强制同步server(ceph1)时间。
1ntpdate ceph1
- 在除ceph1的所有节点写入硬件时钟,避免重启后失效。
1hwclock -w
- 在除ceph1的所有节点安装并启动crontab工具。
1
2
3
4
yum install -y crontabs
systemctl enable crond.service
systemctl start crond
crontab -e
- 添加以下内容,每隔10分钟自动与ceph1同步时间。
1*/10 * * * * /usr/sbin/ntpdate 192.168.3.166
- 在ceph1节点启动NTP服务,并检查状态。
- 安装NTP服务。
- 配置免密登录。
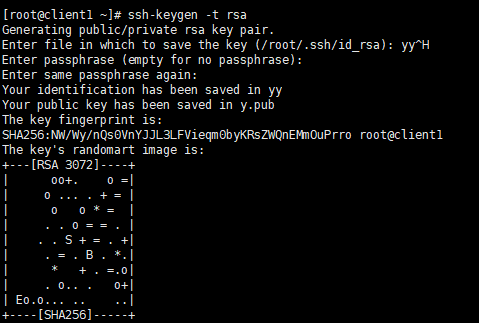
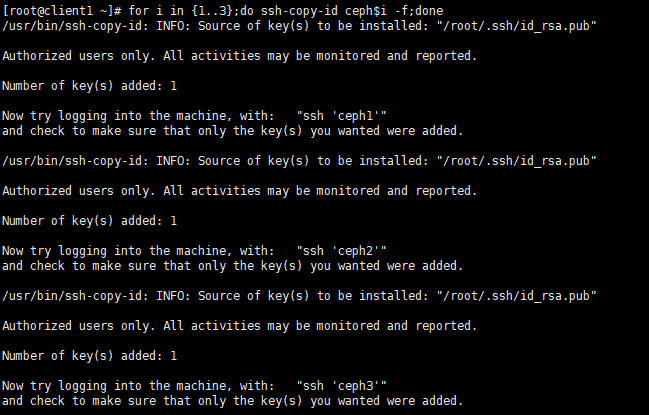
在ceph1节点生成公钥,并发放到各个服务端/客户端节点。
- 对于ceph1、ceph2、ceph3、client1、client2、client3的三节点网络:
1
2
3
ssh-keygen -t rsa
for i in {1..3};do ssh-copy-id ceph$i;done
for i in {1..3};do ssh-copy-id client$i;done
- 对于ceph1、client1的单节点网络:
1
2
3
ssh-keygen -t rsa
ssh-copy-id ceph1
ssh-copy-id client1
输入第一条命令“ssh-keygen -t rsa”之后,按回车使用默认配置。
- 对于ceph1、ceph2、ceph3、client1、client2、client3的三节点网络:
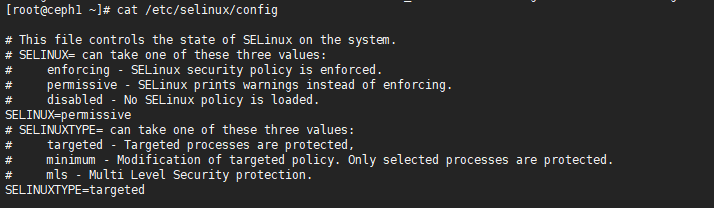
- 设置permissive模式。
设置permissive模式,需在所有服务端节点和客户端节点执行。
- 临时关闭,重启操作系统后失效,与下一条互补。
1setenforce permissive
- 永久设置,下次重启自动生效。
1vi /etc/selinux/config修改SELINUX=permissive。
- 临时关闭,重启操作系统后失效,与下一条互补。