按照上述流程搭建好环境后,就可以启动机密虚机。当前支持的启动方式是使用以下libvirt命令启动。
libvirt方式启动
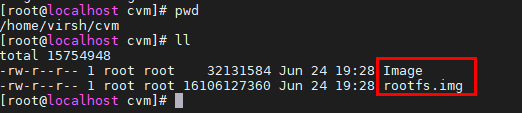
- 将编译Guest Kernel和rootfs生成的Image和rootfs文件拷贝至目标环境。
- 创建并编辑libvirt启动机密虚机的cvm.xml,编辑内容如下:
==================================================================================
<domain type='kvm' xmlns:qemu="http://libvirt.org/schemas/domain/qemu/1.0">
<name>cvm</name>
<memory unit='GiB'>1</memory>
<vcpu placement='static'>1</vcpu>
<iothreads>1</iothreads>
<cputune>
<vcpupin vcpu='0' cpuset='4'/>
<emulatorpin cpuset='4'/>
</cputune>
<numatune>
<memnode cellid='0' mode='strict' nodeset='0'/>
</numatune>
<os>
<type arch='aarch64' machine='virt'>hvm</type>
<kernel>/home/virsh/cvm/Image</kernel>
<cmdline>swiotlb=262144,force console=tty0 console=ttyAMA0 kaslr.disabled=1 root=/dev/vda rw rodata=off cma=64M cvm_guest=1 virtcca_cvm_guest=1</cmdline>
</os>
<features>
<gic version='3'/>
</features>
<cpu mode='host-passthrough'>
<topology sockets='1' cores='1' threads='1'/>
<numa>
<cell id='0' cpus='0' memory='1' unit='GiB'/>
</numa>
</cpu>
<clock offset='utc'/>
<devices>
<emulator>/usr/libexec/qemu-kvm</emulator>
<console type='pty'/>
<disk type='file' device='disk' model='virtio-non-transitional'>
<driver name='qemu' type='raw' queues='2' cache='none' iommu='on'/>
<source file='/home/virsh/cvm/rootfs.img'/>
<target dev='vda' bus='virtio'/>
</disk>
<interface type='bridge'>
<source bridge='br1'/>
<driver iommu='on'/>
<model type='virtio-non-transitional'/>
</interface>
</devices>
<launchSecurity type='cvm'>
</launchSecurity>
<qemu:commandline>
<qemu:arg value='-object'/>
<qemu:arg value='tmm-guest,id=tmm0,sve-vector-length=128,num-pmu-counters=1'/>
</qemu:commandline>
</domain>
==================================================================================

- “sve-vector-length”和“num-pmu-counters”属于可选配置参数。 只有当SVE特性开启后,才可配置sve-vector-length。
- cputune中emulatorpin的cpuset范围要与vcpupin的cpuset范围重合,否则会出现ttyAMA0超时问题。
- 启动前准备。
- 使用virsh define定义虚机配置。
virsh define cvm.xml

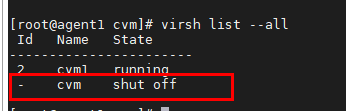
- 执行以下命令查看虚机定义。
virsh list --all
Name与xml中<name>cvm</name>一致。
- 执行以下命令启动机密虚机。
virsh start cvm

- 执行以下命令进入机密虚机串口。
virsh console cvm


多NUMA使能
- 支持虚拟NUMA node绑定一个物理NUAM范围。虚机安全内存将会在指定NUMA范围内分配,libvirt虚机配置中关于绑定物理NUMA范围示例如下。
<numatune>
          <memnode cellid='0' mode='strict' nodeset='1-3' />
</numatune>
对于上述配置,虚机安全内存将会尝试在NUMA 1、2、3上分配。等价写法为:nodeset='1,2,3'。
- 支持在多NUMA上分配安全内存,以支持启动大虚机,配置示例如下。
<numatune>
          <memnode cellid='0' mode='strict' nodeset='0' />
          <memnode cellid='1' mode='strict' nodeset='3' />
</numatune>
<cpu mode='host-passthrough'>
<topology sockets='1' dies='1' clusters='1' cores='8' threads='1'/>
    <numa>
            <cell id='0' cpus='0-3' memory='4' unit='GiB'/>
            <cell id='1' cpus='4-7' memory='4' unit='GiB'/>
    </numa>
</cpu>
- 对于上述配置,机密虚机将在NUMA0和NUMA3上各分配4G安全内存。
- 配置示例中vCPU的数量为8,cvm.xml中对应配置修改如下:<vcpu placement='static'>8</vcpu>。
- 已知开源问题及解决方案请参见启动虚拟机失败,QEMU报错。