
仅需在主节点ceph1节点上执行。
- 创建集群。
1
2
cd /etc/ceph
ceph-deploy new ceph1 ceph2 ceph3
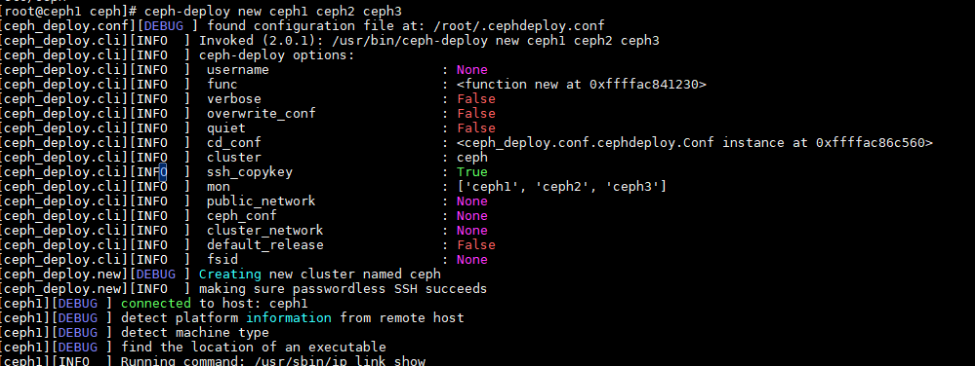
“/etc/ceph”目录下自动生成的“ceph.conf”文件。
- 修改相关配置。修改用于将内部集群间的网络与外部访问的网络隔离。配置192.168.4.0用于内部存储集群之间的数据同步(仅在服务端节点间使用),192.168.3.0用于服务端节点与客户端节点的数据交互。
- 打开“ceph.conf”文件。
配置节点命令以及使用ceph-deploy配置
OSD 时,需在“/etc/ceph”目录下执行,否则会报错。1vim /etc/ceph/ceph.conf
- 按“i”键进入编辑模式,对文件内容进行如下修改。
 1
 2
 3
 4
 5
 6
 7
 8
 9
10
11
12
13
14
15
16
17
18
[global]
fsid = f5a4f55c-d25b-4339-a1ab-0fceb4a2996f
mon_initial_members = ceph1, ceph2, ceph3
mon_host = 192.168.3.166,192.168.3.167,192.168.3.168
auth_cluster_required = cephx
auth_service_required = cephx
auth_client_required = cephx

public_network = 192.168.3.0/24
cluster_network = 192.168.4.0/24

rbd_op_threads=16 # rbd tp线程数

bluestore_prefer_deferred_size_hdd = 0
osd_memory_target = 2147483648 # 限制OSD内存的参数
bluestore_default_buffered_read = false # 当读取完成时,根据标记决定是否缓存
[mon]
mon_allow_pool_delete = true
Ceph 14.2.8版本在使用bluestore引擎的时候默认会打开bluefs的buffer开关,可能导致系统下内存全部被buff/cache占用,导致性能下降。可以采用以下两种方案解决:- 在集群压力不大的场景下可以将“bluefs_buffered_io”开关设置成“false”。
- 可以通过定时执行echo 3 > /proc/sys/vm/drop_caches来强制回收“buffer/cache”中的内存。
- 按“Esc”键退出编辑模式,输入:wq!并按“Enter”键保存退出文件。
- 打开“ceph.conf”文件。
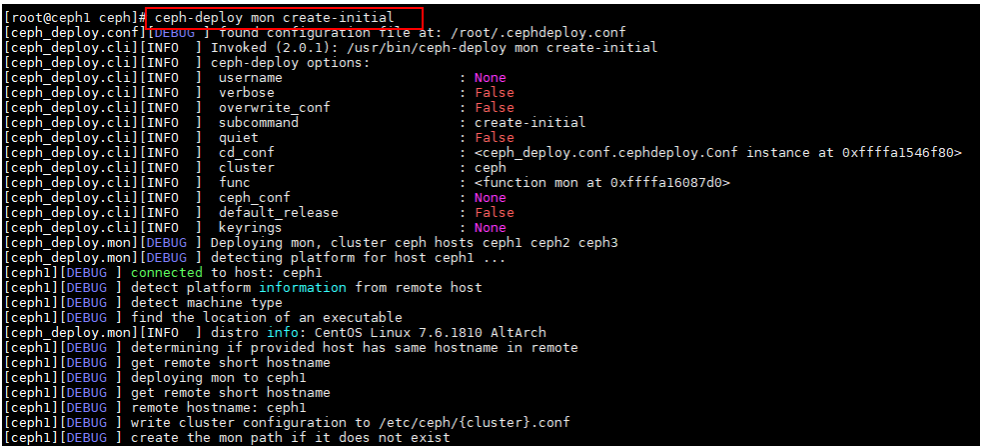
- 初始化监视器并收集
密钥 。1ceph-deploy mon create-initial
执行完成后,脚本会自动生成ceph.client.admin.keyring,该密钥并不会在回显中打印。执行成功回显如下图所示。
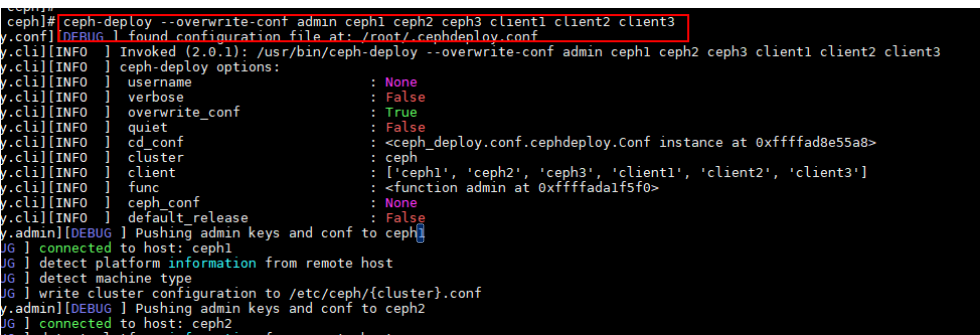
- 将ceph.client.admin.keyring拷贝到各个节点上。
1ceph-deploy --overwrite-conf admin ceph1 ceph2 ceph3 client1 client2 client3
执行成功回显如下图所示。
- 查看是否配置成功。
1ceph -s配置成功回显如下所示。
1
2
3
4
5
cluster:
id:     f6b3c38c-7241-44b3-b433-52e276dd53c6
health: HEALTH_OK
services:
mon: 3 daemons, quorum ceph1,ceph2,ceph3 (age 25h)