- 在客户端节点上启动容器。

- 根据当前系统所使用的容器技术调整本节容器操作相关命令。
- 本小节示例命令以Podman为例,如使用Docker技术,将命令换为Docker即可。
- [IMAGE_ID]需要替换为实际podman images命令查看的镜像ID。
- podman run命令中 --name参数指定容器的名称,--hostname参数指定容器内部主机的名称。本小节部署的客户端与部署RGW节点中的client1节点是同一个节点。
- 自制镜像时,需要手动将镜像拷贝到客户端节点。
1
2
3
podman load -i ceph_release.tar
podman tag [IMAGE_ID] localhost/ceph_release:v17.2.8
podman run --name client1 --hostname client1 --privileged --net=host --ipc=host -dti localhost/ceph_release:v17.2.8 /usr/sbin/init
- 如果使用Ceph官方镜像,可直接拉取官网镜像进行部署即可,需联网。
1podman run --name client1 --hostname client1 --privileged --net=host --ipc=host -dti quay.io/ceph/ceph:v17 /usr/sbin/init
- 从服务端同步配置文件至客户端。
- 确保client1节点上/etc/ceph文件夹存在。
1sudo mkdir -p /etc/ceph
- 同步配置。
1
2
3
4
5
scp -r ceph1:/etc/ceph/ceph.conf /etc/ceph/
scp -r ceph1:/etc/ceph/ceph.client.admin.keyring /etc/ceph/
podman exec client1 mkdir -p /etc/ceph
podman cp /etc/ceph/ceph.conf client1:/etc/ceph/
podman cp /etc/ceph/ceph.client.admin.keyring client1:/etc/ceph/
- 确保client1节点上/etc/ceph文件夹存在。
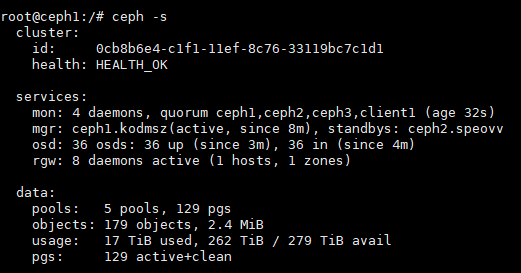
- 进入客户端容器查看集群状态。
1
2
podman exec -it client1 /bin/bash
ceph -s

 Ceph17默认会根据OSD数量自动调整PG数量,需要关闭此配置。
1ceph osd pool set ${pool_name} pg_autoscale_mode off