在虚拟机部署vKAE
以使用8C16G的虚拟机规格为例描述在虚拟机中部署vKAE的详细操作步骤,包括在虚拟机上准备KAE环境、在虚拟机中安装KAE、配置VF直通到虚拟机,以及验证vKAE是否成功安装并启用。
- 在虚拟机上准备KAE环境。
- 安装依赖。
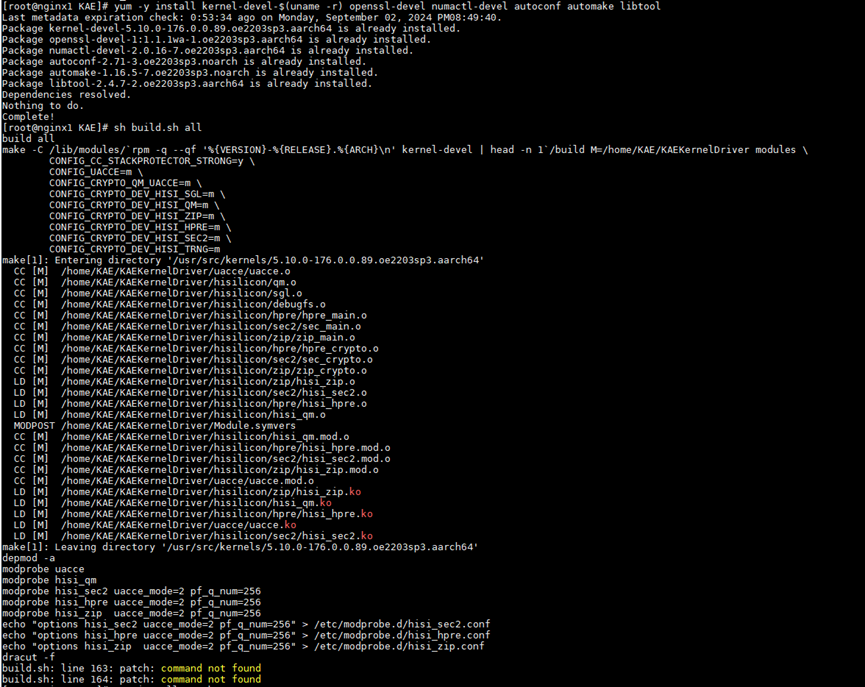
yum -y install kernel-devel-$(uname -r) openssl-devel numactl-devel gcc make autoconf automake libtool patch
在虚拟机中安装依赖时,需要安装patch,否则安装KAE过程中会报错,如下图所示。
- 获取KAE2.0源码包。
git clone https://gitee.com/kunpengcompute/KAE.git -b kae2

- 通过源码安装KAE。

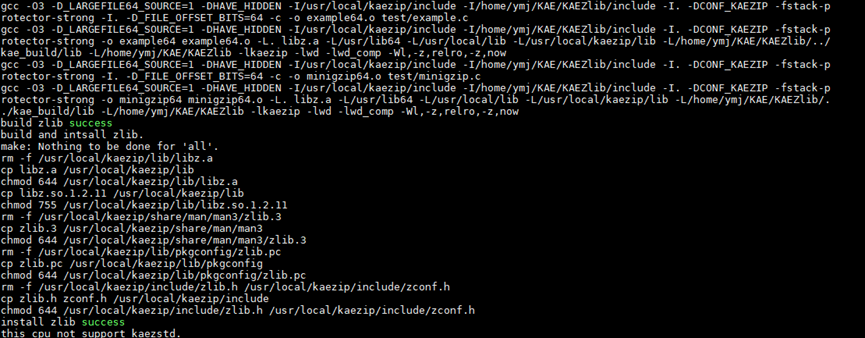
sh build.sh all安装命令可以一键式安装KAE,使用该安装命令前建议先执行sh build.sh cleanup进行清理操作。
- 进入KAE源码目录,执行安装前,先进行清理操作。
cd KAE
sh build.sh cleanup
- 一键式安装KAE。
sh build.sh all
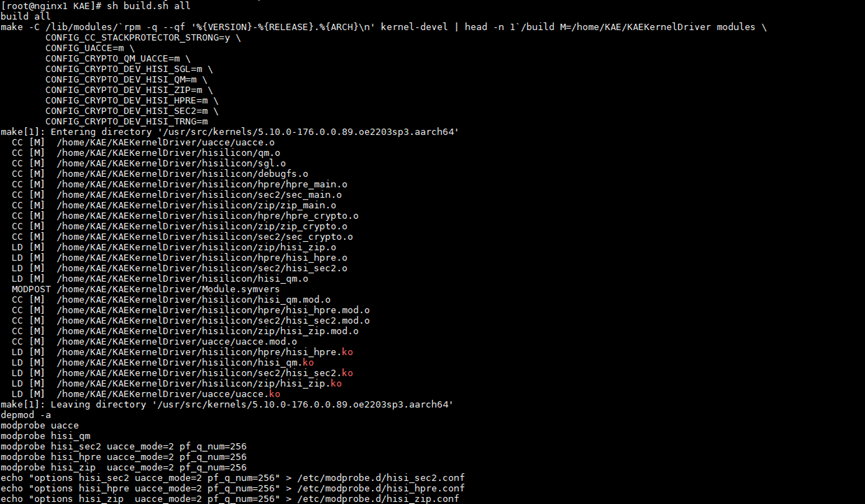
预期结果如下,表示安装KAE成功。
- 进入KAE源码目录,执行安装前,先进行清理操作。
- 安装依赖。
- 使用vKAE前,需要在服务器KAE设备上创建VF,然后将VF直通到虚拟机中,才可以让虚拟机使能vKAE进行加速。需要使用HPRE加速器使能加解密加速。
查看已安装的KAE包含的加速器名称。后续需要通过加速器的名称来查找加速器设备对应的PCI编号,从而根据PCI编号来创建VF。
ls /sys/class/uacce


本步骤中的回显仅为举例。不同服务器包含的加速器数量也不尽相同。例如:

- 查看hisi_hpre-1加速器设备的实际路径和PCI编号。
cd /sys/class/uacce/hisi_hpre-1/device
realpath .

- 以hisi_hpre-1为例,使用hisi_hpre-1加速器创建3个KAE设备VF直通虚拟机。
echo 3 > /sys/devices/pci0000:78/0000:78:00.0/0000:79:00.0/sriov_numvfs
查看KAE设备VF是否创建成功。
ls -al /sys/class/uacce
可以看到除了物理加速设备外,还多出来3个虚拟加速设备。
一台服务器中可能包含多个HPRE加速器,每个HPRE加速器提供了1024个队列,单个PF默认使用256个队列,其余768个队列则预留给VF使用。VF队列数量 = (1024-PF队列数量) / VF个数,余数队列会加到最后一个VF上。推荐一个PF虚拟化出8个VF数目。
通过以下命令可以查看已创建的VF所在的文件夹。
cd /sys/class/uacce/hisi_hpre-1/device
ls

- 创建3个KAE设备VF之后,可以看到hisi_hpre-1加速器列表中存在三个虚拟机加速设备:virtfn0、virtfn1和virtfn2。可以分别查看virtfn0、virtfn1和virtfn2的PCI编号以便将VF直通到虚拟机。
cd virtfn0
realpath .

cd virtfn1
realpath .

cd virtfn2
realpath .

- 修改虚拟机的配置文件,配置KAE设备VF直通虚拟机。
- 给虚拟机配置1个KAE设备VF。
- 打开虚拟机配置文件,例如“vm01.xml”。
vim vm01.xml
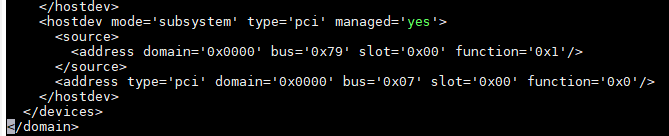
- 按“i”键进入编辑模式,将以下内容复制到虚拟机配置文件的<devices>标签中。
1
2
<hostdev mode='subsystem' type='pci' managed='yes'><source><address domain='0x0000' bus='0x79' slot='0x00' function='0x1'/></source><address type='pci' domain='0x0000' bus='0x07' slot='0x00' function='0x0'/>
</hostdev>
- 相当于把VF地址0000:79:00.1进行拆分,domain域使用0000部分,bus域使用79部分,slot域使用00部分,function使用末位的1。
- 如果当前虚拟机已存在该address,为避免address冲突导致虚拟机启动失败,需要删除</source>之后的address一行。重启虚拟机后,系统会自动生成新的address。
- 按“Esc”键,输入:wq!,按“Enter”保存并退出编辑。
- 重启虚拟机,使KAE设备VF直通虚拟机生效。
reboot
上述的配置完成后,KAE设备VF直通虚拟机成功。
- 打开虚拟机配置文件,例如“vm01.xml”。
- 给虚拟机配置多个KAE设备VF。
- 打开虚拟机配置文件,例如“vm01.xml”。
vim vm01.xml
- 按“i”键进入编辑模式,将以下内容复制到虚拟机配置文件的<devices>标签中。
1
2
3
4
<hostdev mode='subsystem' type='pci' managed='yes'><source><address domain='0x0000' bus='0x79' slot='0x00' function='0x1'/></source><address type='pci' domain='0x0000' bus='0x07' slot='0x00' function='0x0'/>
</hostdev>
<hostdev mode='subsystem' type='pci' managed='yes'><source><address domain='0x0000' bus='0x79' slot='0x00' function='0x2'/></source><address type='pci' domain='0x0000' bus='0x07' slot='0x00' function='0x1'/>
</hostdev>
- 重启虚拟机,使KAE设备VF直通虚拟机生效。
reboot
- 打开虚拟机配置文件,例如“vm01.xml”。
- 以下提供虚拟机配置文件的一个完整示例,用户可以参考。
以8C16G规格的虚拟机配置文件为例,虚拟机名为nginx1,对虚拟机进行了顺序绑核和内存绑核。修改完配置文件后重启虚拟机,使VF直通虚拟机生效。
- 打开虚拟机配置文件,例如“vm01.xml”。
vim vm01.xml
- 按“i”键进入编辑模式,将以下内容复制到虚拟机配置文件中。
  1
  2
  3
  4
  5
  6
  7
  8
  9
 10
 11
 12
 13
 14
 15
 16
 17
 18
 19
 20
 21
 22
 23
 24
 25
 26
 27
 28
 29
 30
 31
 32
 33
 34
 35
 36
 37
 38
 39
 40
 41
 42
 43
 44
 45
 46
 47
 48
 49
 50
 51
 52
 53
 54
 55
 56
 57
 58
 59
 60
 61
 62
 63
 64
 65
 66
 67
 68
 69
 70
 71
 72
 73
 74
 75
 76
 77
 78
 79
 80
 81
 82
 83
 84
 85
 86
 87
 88
 89
 90
 91
 92
 93
 94
 95
 96
 97
 98
 99
100
101
102
103
104
105
106
107
108
109
110
111
112
113
114
115
116
117
118
119
120
121
122
123
124
125
126
127
128
129
<domain type='kvm'>
  <name>vm01</name>
  <uuid>a1d11347-8738-45fb-8944-e3a058f464c9</uuid>
  <memory unit='KiB'>16777216</memory>
  <currentMemory unit='KiB'>16777216</currentMemory>
  <memoryBacking>
    <hugepages/>
  </memoryBacking>
  <vcpu placement='static'>8</vcpu>
  <cputune>
    <vcpupin vcpu='0' cpuset='4'/>
    <vcpupin vcpu='1' cpuset='5'/>
    <vcpupin vcpu='2' cpuset='6'/>
    <vcpupin vcpu='3' cpuset='7'/>
    <vcpupin vcpu='4' cpuset='8'/>
    <vcpupin vcpu='5' cpuset='9'/>
    <vcpupin vcpu='6' cpuset='10'/>
    <vcpupin vcpu='7' cpuset='11'/>
    <emulatorpin cpuset='4-11'/>
  </cputune>
  <numatune>
    <memnode cellid='0' mode='strict' nodeset='0'/>
  </numatune>
  <os>
    <type arch='aarch64' machine='virt-6.2'>hvm</type>
    <loader readonly='yes' type='pflash'>/usr/share/edk2/aarch64/QEMU_EFI-pflash.raw</loader>
    <nvram>/var/lib/libvirt/qemu/nvram/nginx1_VARS.fd</nvram>
    <boot dev='hd'/>
  </os>
  <features>
    <acpi/>
    <gic version='3'/>
  </features>
  <cpu mode='host-passthrough' check='none'>
    <topology sockets='1' dies='1' clusters='1' cores='8' threads='1'/>
    <numa>
      <cell id='0' cpus='0-7' memory='16777216' unit='KiB'/>
    </numa>
  </cpu>
  <clock offset='utc'/>
  <on_poweroff>destroy</on_poweroff>
  <on_reboot>restart</on_reboot>
  <on_crash>destroy</on_crash>
  <devices>
    <emulator>/usr/libexec/qemu-kvm</emulator>
    <disk type='file' device='disk'>
      <driver name='qemu' type='qcow2'/>
      <source file='/home/images/nginx1.img'/>
      <target dev='vda' bus='virtio'/>
      <address type='pci' domain='0x0000' bus='0x05' slot='0x00' function='0x0'/>
    </disk>
    <disk type='file' device='cdrom'>
      <driver name='qemu' type='raw'/>
      <target dev='sda' bus='scsi'/>
      <readonly/>
      <address type='drive' controller='0' bus='0' target='0' unit='0'/>
    </disk>
    <controller type='usb' index='0' model='qemu-xhci' ports='15'>
      <address type='pci' domain='0x0000' bus='0x02' slot='0x00' function='0x0'/>
    </controller>
    <controller type='scsi' index='0' model='virtio-scsi'>
      <address type='pci' domain='0x0000' bus='0x03' slot='0x00' function='0x0'/>
    </controller>
    <controller type='pci' index='0' model='pcie-root'/>
    <controller type='pci' index='1' model='pcie-root-port'>
      <model name='pcie-root-port'/>
      <target chassis='1' port='0x8'/>
      <address type='pci' domain='0x0000' bus='0x00' slot='0x01' function='0x0' multifunction='on'/>
    </controller>
    <controller type='pci' index='2' model='pcie-root-port'>
      <model name='pcie-root-port'/>
      <target chassis='2' port='0x9'/>
      <address type='pci' domain='0x0000' bus='0x00' slot='0x01' function='0x1'/>
    </controller>
    <controller type='pci' index='3' model='pcie-root-port'>
      <model name='pcie-root-port'/>
      <target chassis='3' port='0xa'/>
      <address type='pci' domain='0x0000' bus='0x00' slot='0x01' function='0x2'/>
    </controller>
    <controller type='pci' index='4' model='pcie-root-port'>
      <model name='pcie-root-port'/>
      <target chassis='4' port='0xb'/>
      <address type='pci' domain='0x0000' bus='0x00' slot='0x01' function='0x3'/>
    </controller>
<controller type='pci' index='5' model='pcie-root-port'>
      <model name='pcie-root-port'/>
      <target chassis='5' port='0xc'/>
      <address type='pci' domain='0x0000' bus='0x00' slot='0x01' function='0x4'/>
    </controller>
    <controller type='pci' index='6' model='pcie-root-port'>
      <model name='pcie-root-port'/>
      <target chassis='6' port='0xd'/>
      <address type='pci' domain='0x0000' bus='0x00' slot='0x01' function='0x5'/>
    </controller>
    <controller type='virtio-serial' index='0'>
      <address type='pci' domain='0x0000' bus='0x04' slot='0x00' function='0x0'/>
    </controller>
    <interface type='network'>
      <mac address='52:54:00:b4:09:bc'/>
      <source network='default'/>
      <model type='virtio'/>
      <address type='pci' domain='0x0000' bus='0x01' slot='0x00' function='0x0'/>
    </interface>
    <serial type='pty'>
      <target type='system-serial' port='0'>
        <model name='pl011'/>
      </target>
    </serial>
    <console type='pty'>
      <target type='serial' port='0'/>
    </console>
    <channel type='unix'>
      <target type='virtio' name='org.qemu.guest_agent.0'/>
      <address type='virtio-serial' controller='0' bus='0' port='1'/>
    </channel>
    <hostdev mode='subsystem' type='pci' managed='yes'>
      <source>
        <address domain='0x0000' bus='0x07' slot='0x00' function='0x1'/>
      </source>
      <address type='pci' domain='0x0000' bus='0x06' slot='0x00' function='0x0'/>
    </hostdev>
    <hostdev mode='subsystem' type='pci' managed='yes'>
      <source>
        <address domain='0x0000' bus='0x79' slot='0x00' function='0x1'/>
      </source>
    <address type='pci' domain='0x0000' bus='0x07' slot='0x00' function='0x0'/>
   </hostdev>
  </devices>
</domain>
加粗的参数请根据实际情况进行修改。
- 重启虚拟机,使VF直通虚拟机生效。
reboot
- 再次查看VF设备。
ls -al /sys/class/uacce
如果被虚拟机直通的VF设备没有在回显中显示,说明该VF直通虚拟机成功。
- 打开虚拟机配置文件,例如“vm01.xml”。
- 给虚拟机配置1个KAE设备VF。
- 验证KAE的安装与配置是否完成。
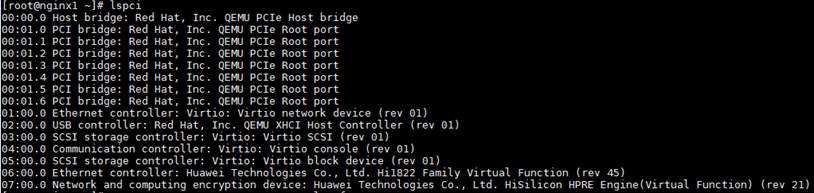
- 在虚拟机内查看KAE设备是否安装成功。
lspci
ll /usr/local/lib/engines-1.1
回显中显示HPRE Engine和kae.so文件,表示KAE设备安装成功。

- 查看VF是否成功挂载到虚拟机上。
ls -al /sys/class/uacce
如果直通的VF设备在物理机上不再显示,说明直通成功。
 查看VF使用的地址。
cd /sys/bus/pci/drivers
cd hisi_hpre
ls

- 验证KAE性能。
配置OpenSSL以使用KAE,并通过执行openssl speed命令来比较开启和未开启KAE时RSA加密解密的性能差异。
- 使能KAE前的性能值。
openssl speed -elapsed rsa2048

- 使能KAE后的性能值。
export OPENSSL_CONF=/home/openssl.cnf
openssl speed -engine kae -elapsed rsa2048

- 使能KAE前的性能值。
- 检查加载模块是否加载。
lsmod | grep uacce
预期结果如下,表示加载模块已经加载。

- 在虚拟机内查看KAE设备是否安装成功。