运行和验证
- 修改lighttpd.conf文件。
- 打开文件。
1vi /usr/local/lighttpd/config/lighttpd.conf - 修改如下内容。
- 修改第16-20行为:
1
2
3
4
5
var.log_root         =   "/usr/local/lighttpd/log"
var.server_root    =   "/usr/local/lighttpd"
var.state_dir        =   "/usr/local/lighttpd"
var.home_dir       =   "/usr/local/lighttpd"
var.conf_dir         =   "/usr/local/lighttpd/config"

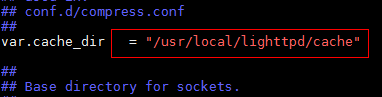
- 修改第61行为:
1var.cache_dir = "/usr/local/lighttpd/cache"
- 注释掉第93行:
1#server.use-ipv6 = "enable"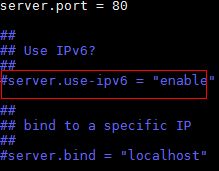
- 修改第104-105行为:
1
2
server.username  =  "lighttpd1"
server.groupname  =  "lighttpd"


该项为操作权限,不建议使用root。
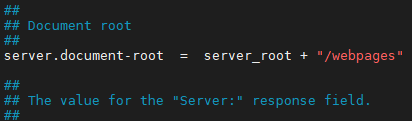
- 修改第115行(访问页面存放路径)为:
1server.document-root = server_root + "/webpages"
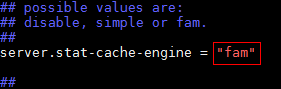
- 修改第246行(缓存模式,默认为simple,官方解释fam要优于simple)为:
1server.stat-cache-engine = "fam"
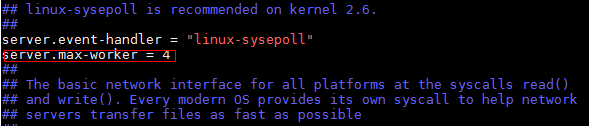
- 在第182行添加如下内容(该项为配置多进程模式,Lighttpd默认单进程,数值可根据实际需求修改) :
1server.max-worker = 4
- 修改第16-20行为:
- 退出并保存。
- 打开文件。
- 创建用户及组Lighttpd。
- 创建组:
1groupadd lighttpd - 创建用户:
1useradd -g lighttpd lighttpd1
- 创建组:
- 修改文件夹的所有权。
1chown lighttpd1 /usr/local/lighttpd/log
- 在“/usr/local/lighttpd/webpages”目录下编写测试网页。
1cd /usr/local/lighttpd/webpages
- 新建html文件。
1vim index.html - 按“i”进入编辑模式,添加以下内容并保存。
1
2
3
4
5
6
7
8
<html>
<head>
<title>lighttpd test</title>
</head>
<body>
<p>this is  a testing</p>
</body>
</html>
- 按“Esc”键,输入:wq!,按“Enter”保存并退出编辑。
- 新建html文件。
- 启动Lighttpd。
1/usr/local/lighttpd/sbin/lighttpd -f /usr/local/lighttpd/config/lighttpd.conf
- 查看Lighttpd进程。
1ps -ef | grep lighttpd

- 验证Lighttpd。
打开浏览器在url处输入:http://IP:80/index.html,可以看到index.html的页面“this is a testing”,则说明运行成功。
- 停止Lighttpd命令如下,业务运行中不需要执行该命令。
1pkill lighttpd
- 查看日志。
1
2
vi /usr/local/lighttpd/log/error.log
vi /usr/local/lighttpd/log/access.log
- 查看侦听端口。
1netstat -anpt | grep 80
- 停止Lighttpd命令如下,业务运行中不需要执行该命令。
父主题: Lighttpd 移植指南